Tutorial: Post Processing -1

This is the first in a series of posts that walk through processing images after they have been taken to modify the image.
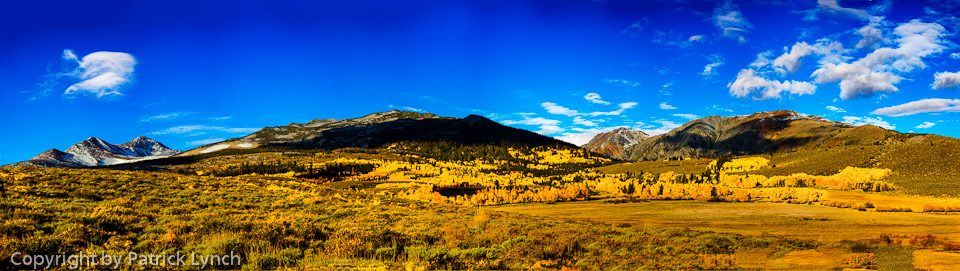
The above image is the output of running three images together to create a higher Dynamic range photo. This image also illustrates that in mid day with hard light, you can still capture images.
I typically shoot triplets when shooting landscape photos. A triplet is 3 photos, a normal exposure, 2 stops under, and 2 stops over. This is the input to the High Dynamic Range (HDR), that results in a TIF file with more color.


I use Photomatix for my conversion;
-
I find it easier to use than Photoshop for the conversion
- I have lots of choices as to what the ‘look’ should look like
- I can run it as a batch program which is very nice after a long day of shooting.
I typically use the ‘Compressor option” in Photomatix to expand the dynamic range and choose the sub option of ‘photographic’ for the syle. Sometimes I use PhotoAcute as well as Photomatix.
Sometimes I’m done at this point, although usually there is something else that needs to be done. I start with the large impact changes first
- Cropping / rotation
- Major change to exposure or white balance
- Then moving to smaller things such as
- selectively changing the color,
- sharpening
- burning 7 dodging equivalents
In the images there is vignetting that needs to be dealt with.
- Easiest way is with the LR ‘Lens Correction Profile’
Next up is the unevenness of the sky that could use some help.
- Use the HSL sliders and with Luminance chosen, choose the blue slider and darken the sky. This also increases the contrast making the picture pop more.
- Next, with Orange & Yellow Luminance sliders, increase the brightness in the tree leaves.
Let’s adjust the Clarity & Vibrance next. In this case, they don’t help the pic, and so I leave them alone.
The result is

Agree... Leave a comment, disagree leave 2 comments